
Posted 1284 days ago
By Dr. Ahmad al-Hassiny
Sponsored by Ivoclar
Part i
Part II
Digital Dentistry offers us incredible tools for treatment on the same day of patients in imedized need and to control each aspect of a case, whether a single crown or change of smile. A digital workflow is not only more efficient than conventional treatment methods to restore the function and aesthetics of a patient, but is also much more precise. Case data digitally can be stored, cloning, sharing with other team members very easily and manipulated so that conventional methods cannot provide. One of the most significant advantages of digitizing a case is the ability to inspect and rotate the captured data, expand them and see all aspects closely, which has a positive impact proven on research on the quality of the preparations and, ultimately, the adjustment and function of the final restorations.
Presented here there are two cases, quite different in nature, that demonstrate the strength, versatility and control of cases that digital dentistry contributes to our practice.
Case 1
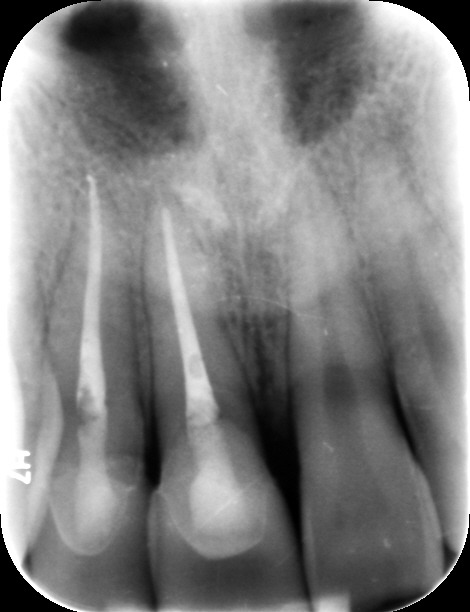
This case shows how a trauma patient can be treated immediately on a single visit. This 19 -year -old man presented my practice with severely fractured teeth #7 and #8 (Figure 1) as a result of being attacked. Unfortunately, he had 48 hours before seeking treatment and the exposed pulp required us to perform the root ducts in both anterior teeth with the accumulation of the nucleus to retain the crowns (Figure 2). The teeth were prepared and the preparations scanned. Two complete contour crowns were grinded in the A2 shadow (IPS E.Max CAD, Ivoclar Vivadent), then crystallized, stained, glaze and placed in the mouth (Figure 3). A year later, the patient returned for a postoperative appointment to guarantee the success of the root duct procedure and that the margins had been completed very well without inflammatory (Figures 4 and 5).
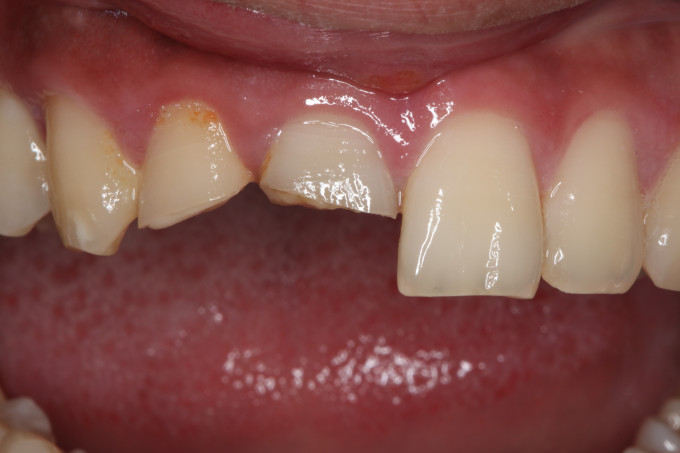
Figure 1: The force of force of force fractured and splintered the anterior teeth of this 19 -year -old patient #7 and #8, which were repaired in a single visit.
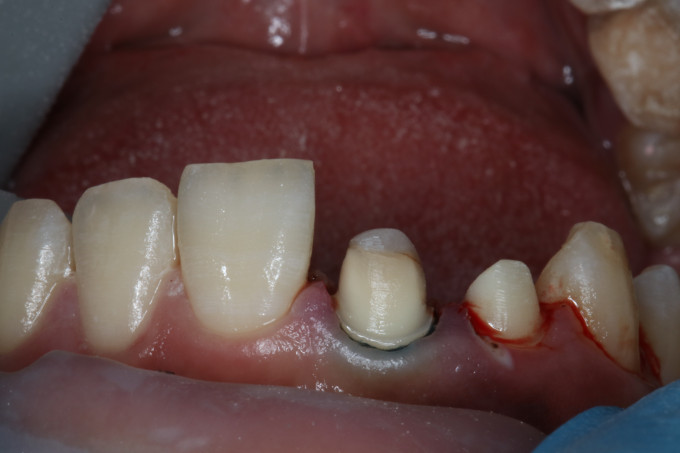
Figure 2: The patient’s delay in the search for treatment resulted in both were necessary due to irreversible pulpitis.

Figure 3: The two CAD crowns of E.Max of complete contour immediately after the seat.

Figures 4 and 5: The patient a year later confirmed the marginal integrity of the two crowns and the success of root therapy.
Case 2 (Val)
This was one of those situations in which the case was not complete in a single visit. However, it demonstrates how digital dentistry allows the clinician to efficiently control each aspect of the case from preparation, timing to the final restorations. A 43 -year -old woman came to my practice for a change of image to repair her shipyard teeth and close the diameter between #8 and #9 (Figure 6). After the exam, it was clear that the root ducts in the #12 and #13 teeth were failing and the pre-mate on their left side was compromised. It was decided to place a full contour bridge of 4 units in the #11-14 teeth and individual crowns in the aesthetic zone in the teeth #6, 7, 8, 9 and 10 (IPS E.Max CAD, Ivoclar Vivadent). The teeth were prepared (Figure 7), scanned and new restorations created. Then we printed a model and fill the putty of putty (Figure 8) with a compound material composite (luxatemp ultra, DMG) to create provisions so that the patient uses them for a week to obtain feedback on the adjustment, function and color (Figure 9). In the final appointment, his comment, the provisions were too white and did not coincide with the rest of his teeth was observed by the grinding of the final restorations (Figures 10-11). The final restorations were ground and sitting in the mouth on that second visit (Figure 12).

Figure 6: This 43 -year -old patient presented multiple non -bird -splintered birds, a large diastro and root ducts.
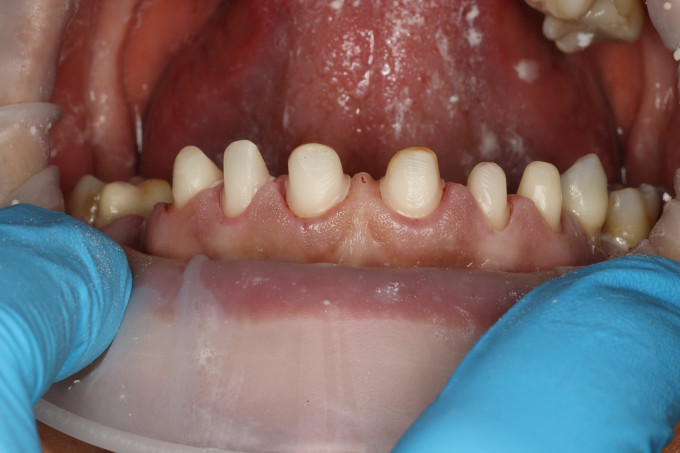
Figure 7: The patient’s teeth were prepared for a zirconium bridge of 4 units in the teeth #11- #14 and full contour crowns on the teeth #6- #10. The preparations were scanned and the bridge and the individual crowns created.
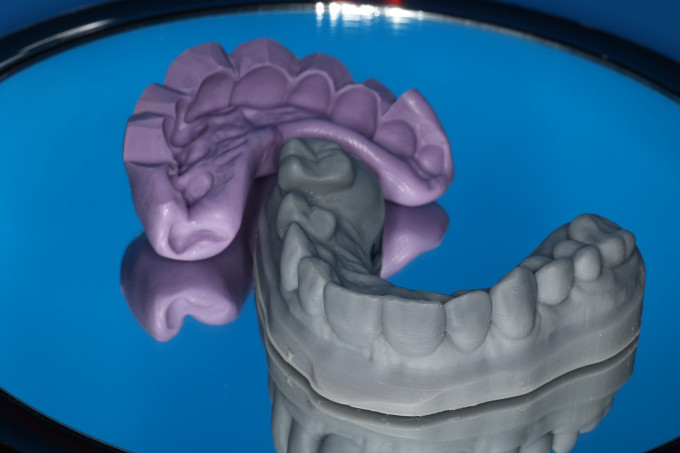
Figure 8: From a scan of the final design, a model was printed 3D and a puttry of putty was used to create provisions.
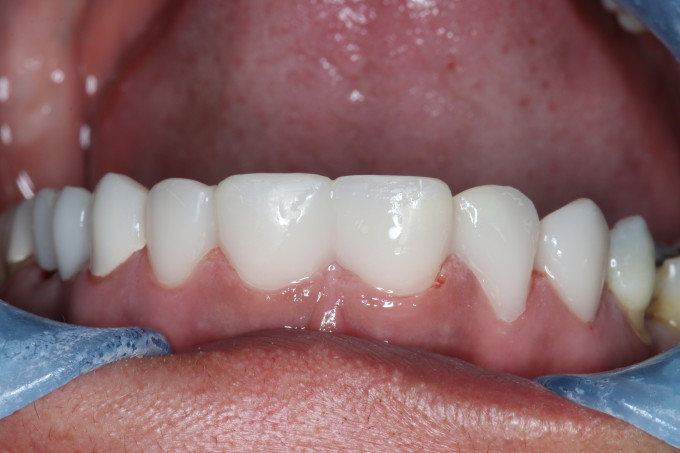
Figure 9: The patient was asked to use provisions for a week to adjust the surface, function and aesthetics of the treatment proposal.

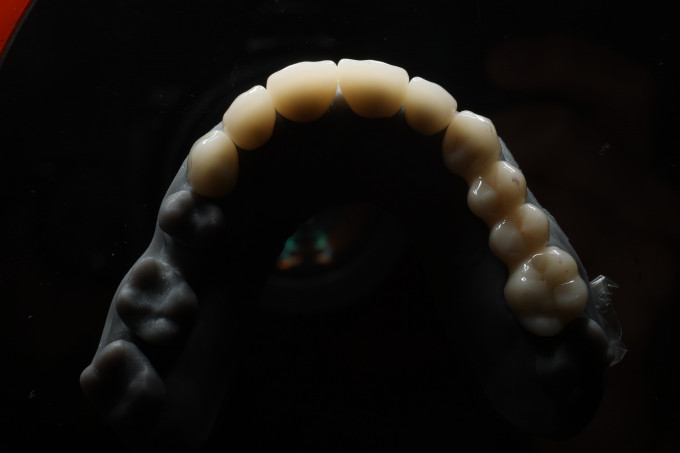
Figures 10 and 11: The final restorations ground in the model and sitting in the mouth.

Figure 12: The final restorations immediately after the seat.